Curatescape projects differ from typical Omeka projects in that the Item record – Omeka’s central unit of content – is used to catalog a specialized Story , rather than, say, an archival photograph or document. Curatescape stories may, of course, include archival photographs and other documents (including audio, video, etc.), but – unlike in a typical Omeka project, such as a digital archive – these files are not the primary content, but rather a component of the textual story. Most often, files are used to complement the story, serving as photographic evidence, illustrating an interpretive perspective, and/or simply adding visual interest. Metadata for each file is stored in a separate File record, which exists within the larger Item record but has its own metadata record. The Story itself is stored at the Item level, with content divided into structured fields and sections within the entry form, including Dublin Core fields, custom Curatescape Story (Item Type) fields, Tags , and plugin-generated fields, such as the Map section.
Using the Admin Forms
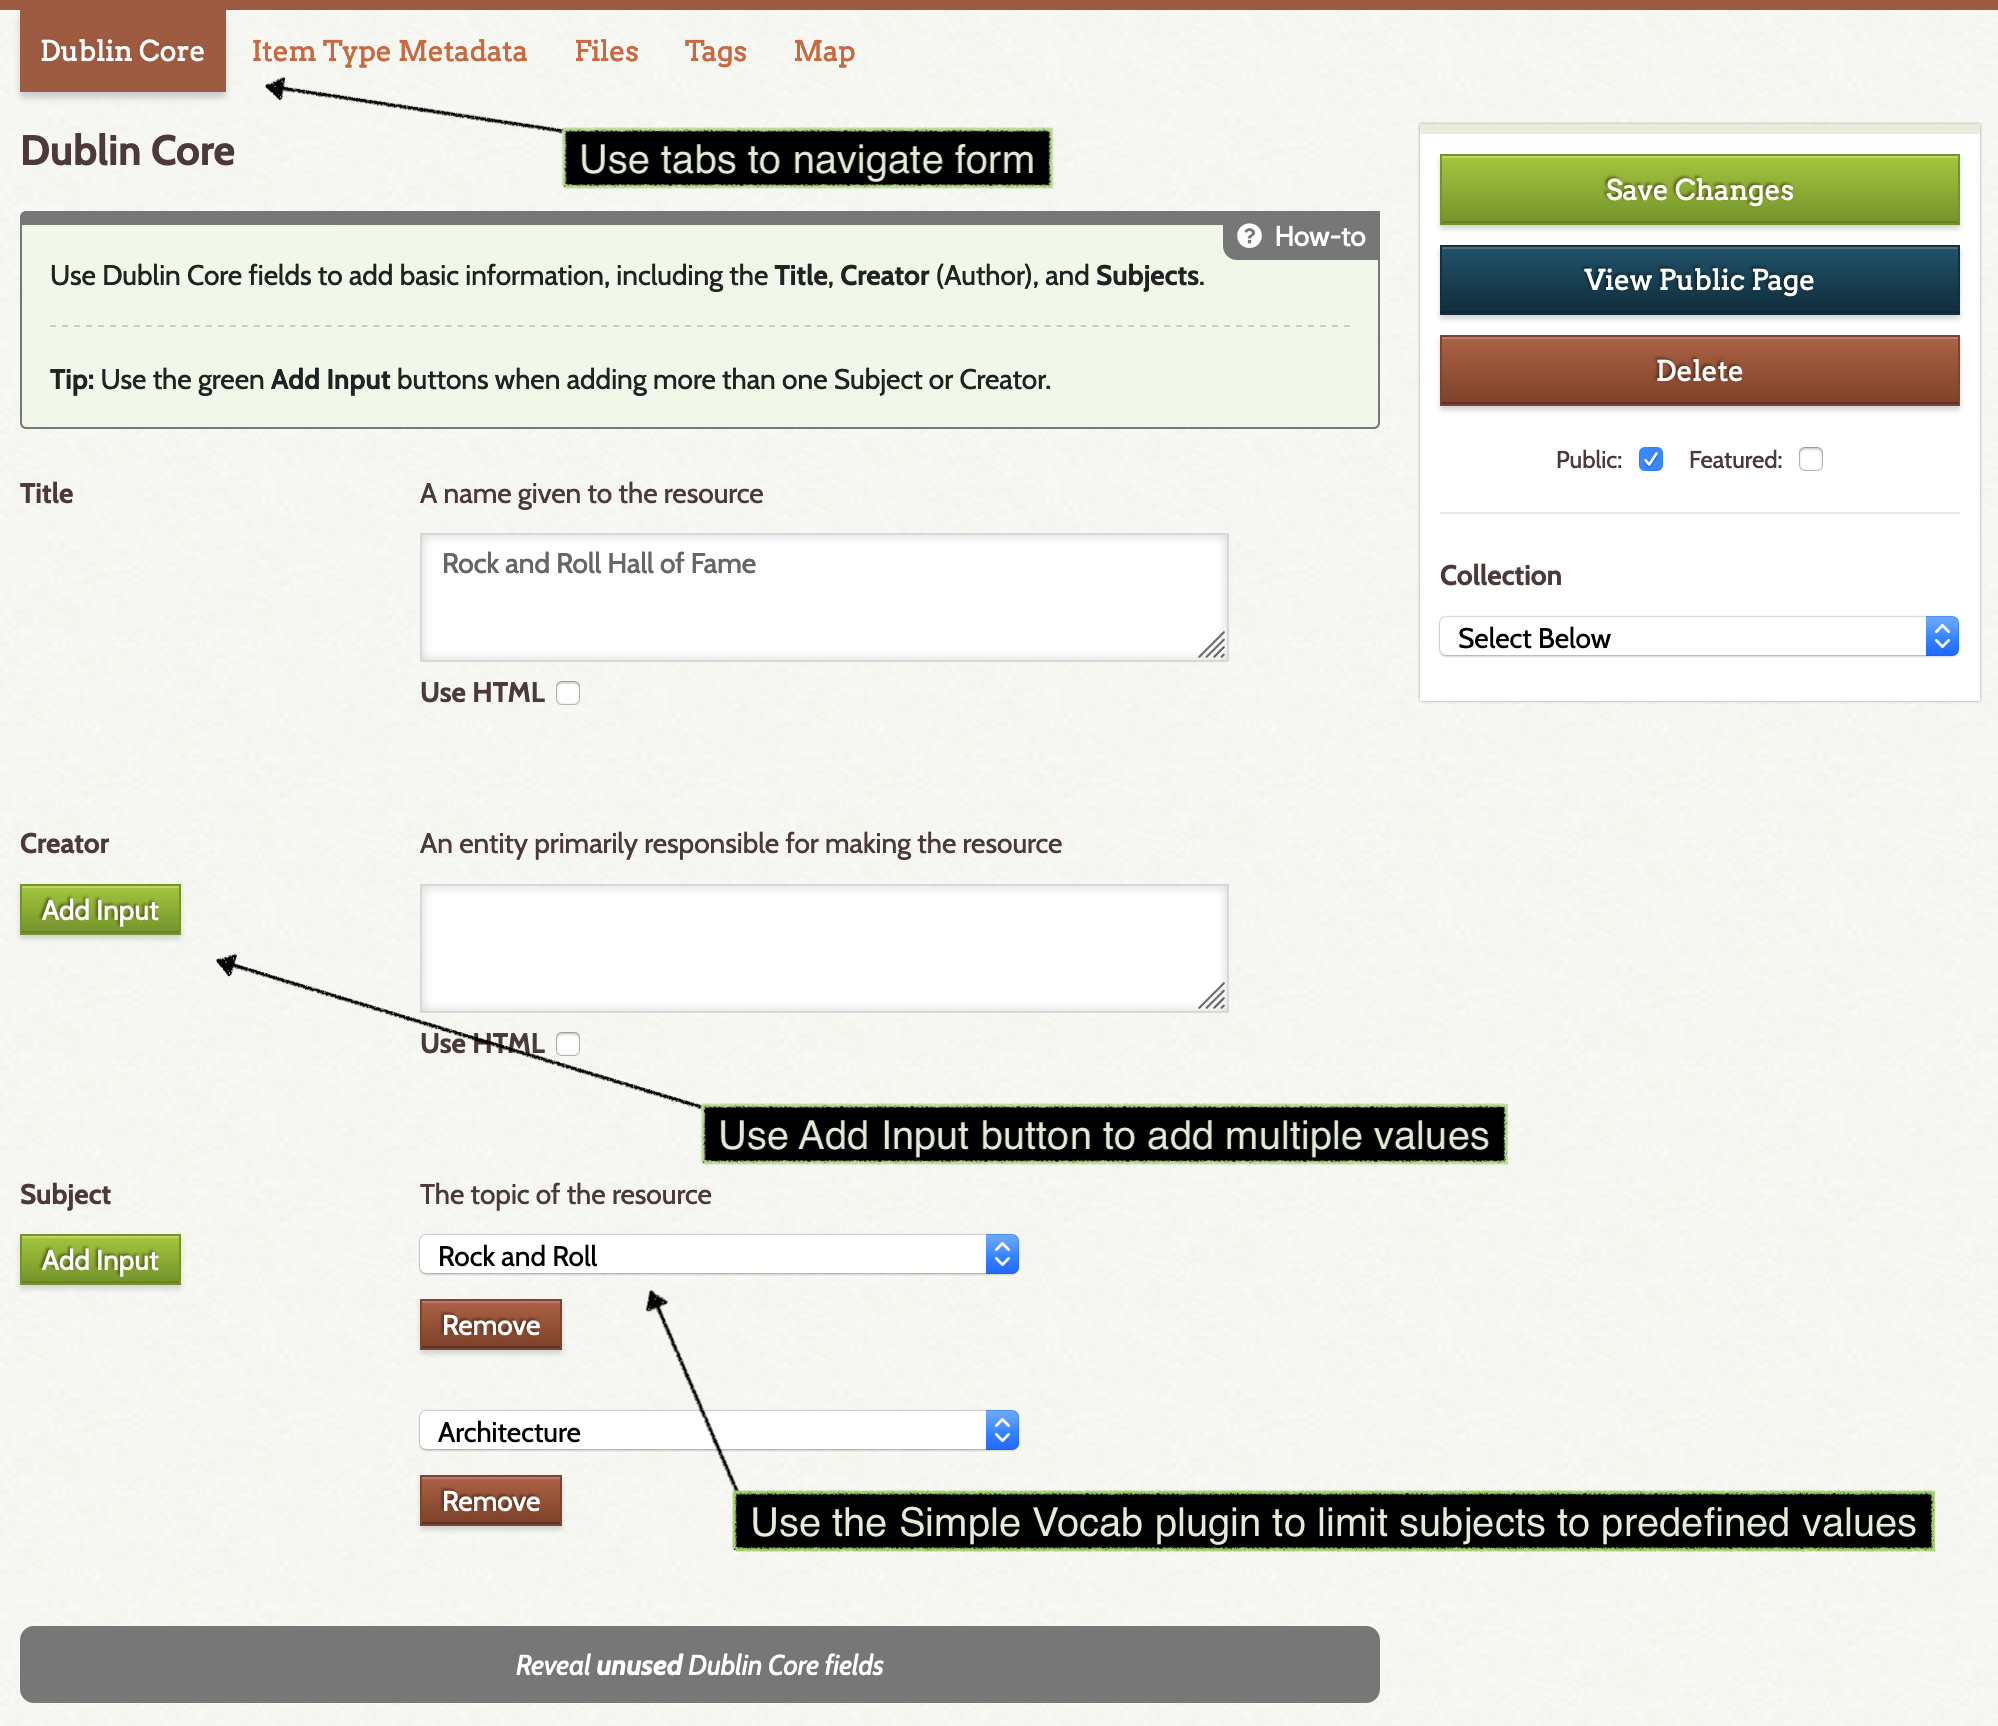
The form for adding items (stories) has multiple tabs. Use the tabs to navigate through each section, then save your work. After saving your item, you may then return to add metadata for each individual file.
Any field that has next it a green “Add Input” button should be noted. These fields should have only one value per instance. So if you have 2 subjects, add the first, click the “Add Input” button, then add the second. This ensures that your content is displayed as intended and also that the advanced search filters and links function correctly.
When adding content, it is important to keep in mind how things will be displayed to users. After adding/editing your item, be sure to click the “View Public Page” button to ensure your content displays as intended.
Only the fields listed below will be displayed.
Metadata for Items (Stories)
-
Dublin Core
– Title
– Creator
– Subjec -
Item Type Metadata (Curatescape Story)
– Subtitle
– Lede
– Story
– Sponsor
– Factoid
– Related Resources
– Official Website
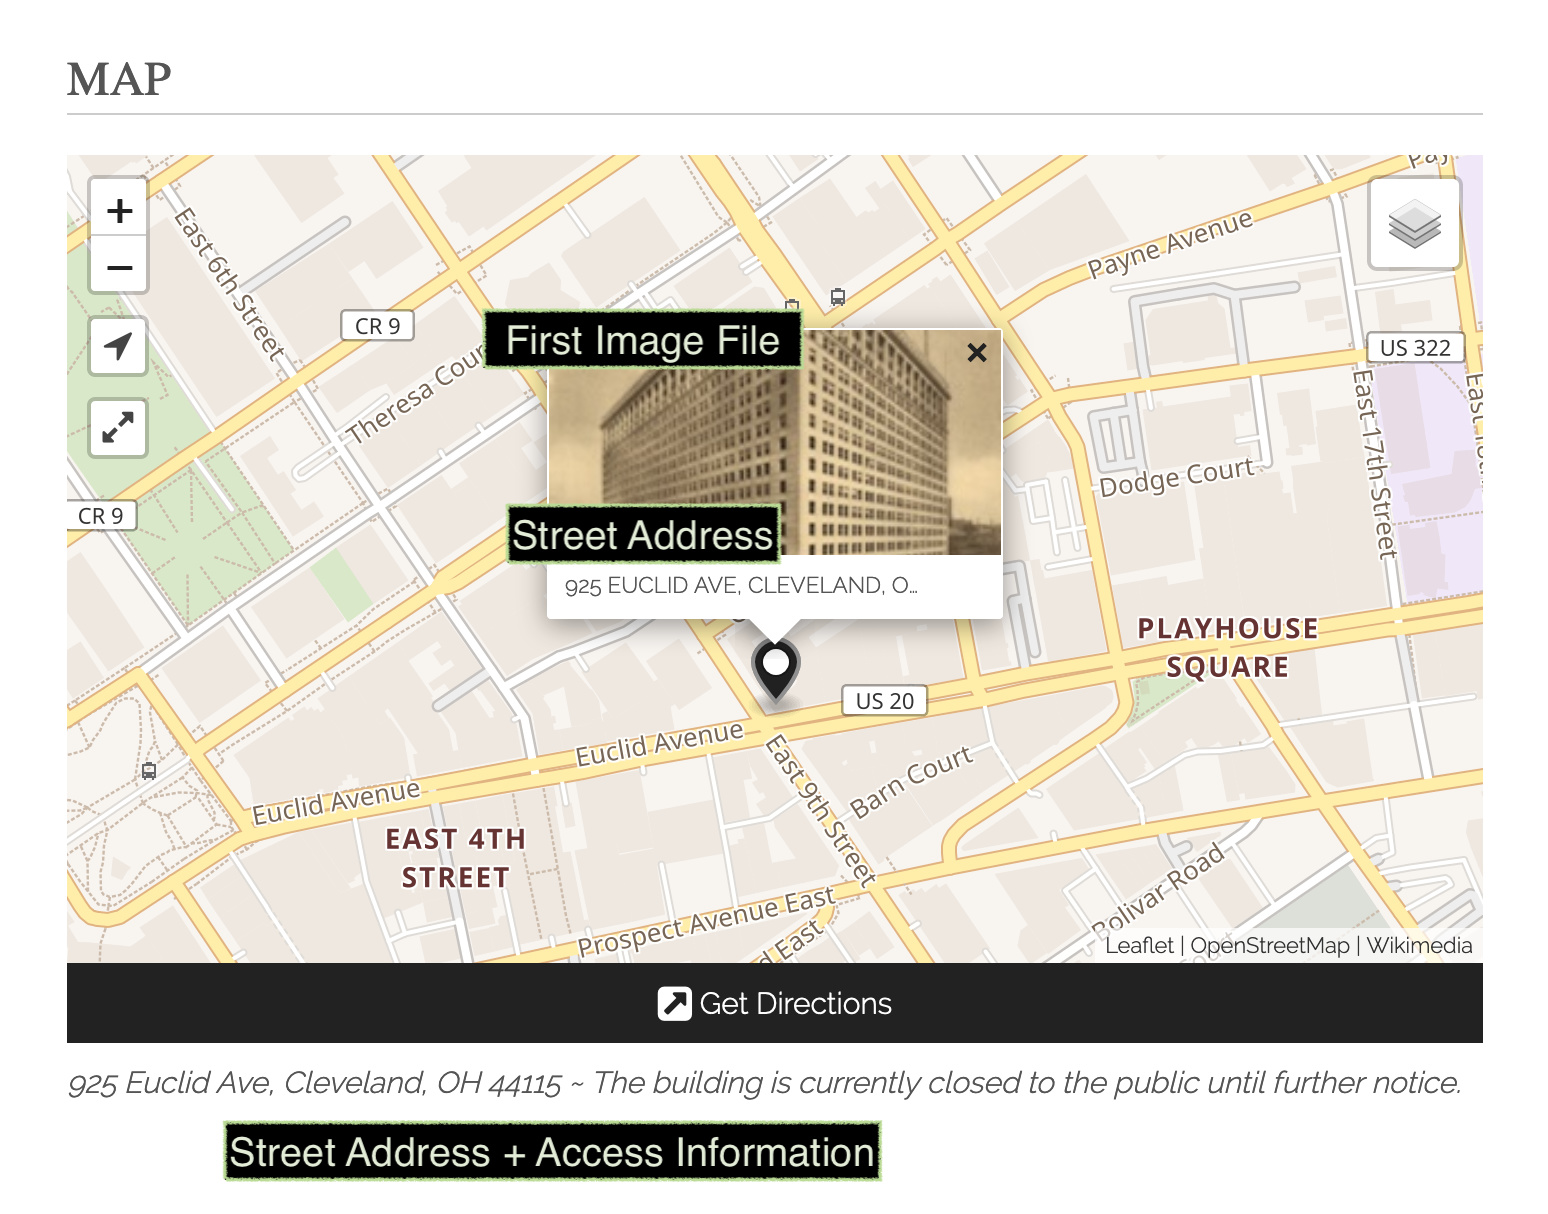
– Street Address
– Access Information - Files (upload files)
- Tags
- Map (add coordinates)
Metadata for Files
After submitting your item form, you will need to return and edit each uploaded file, adding the metadata that is used for the file caption.
-
Dublin Core
– Title
– Description
– Creator
– Source
– Date
– Rights
Additional Dublin Core fields are available for display on the individual file page (each file has a unique page), but the ones listed above are used to construct the file captions.
Header
The header section contains the title, subtitle, lede, and byline. The byline is composed of one or more creators and, optionally, a sponsor name, which is prepended with the phrase “with research support from.” The first image file is used as the “hero image” at the top of the page.
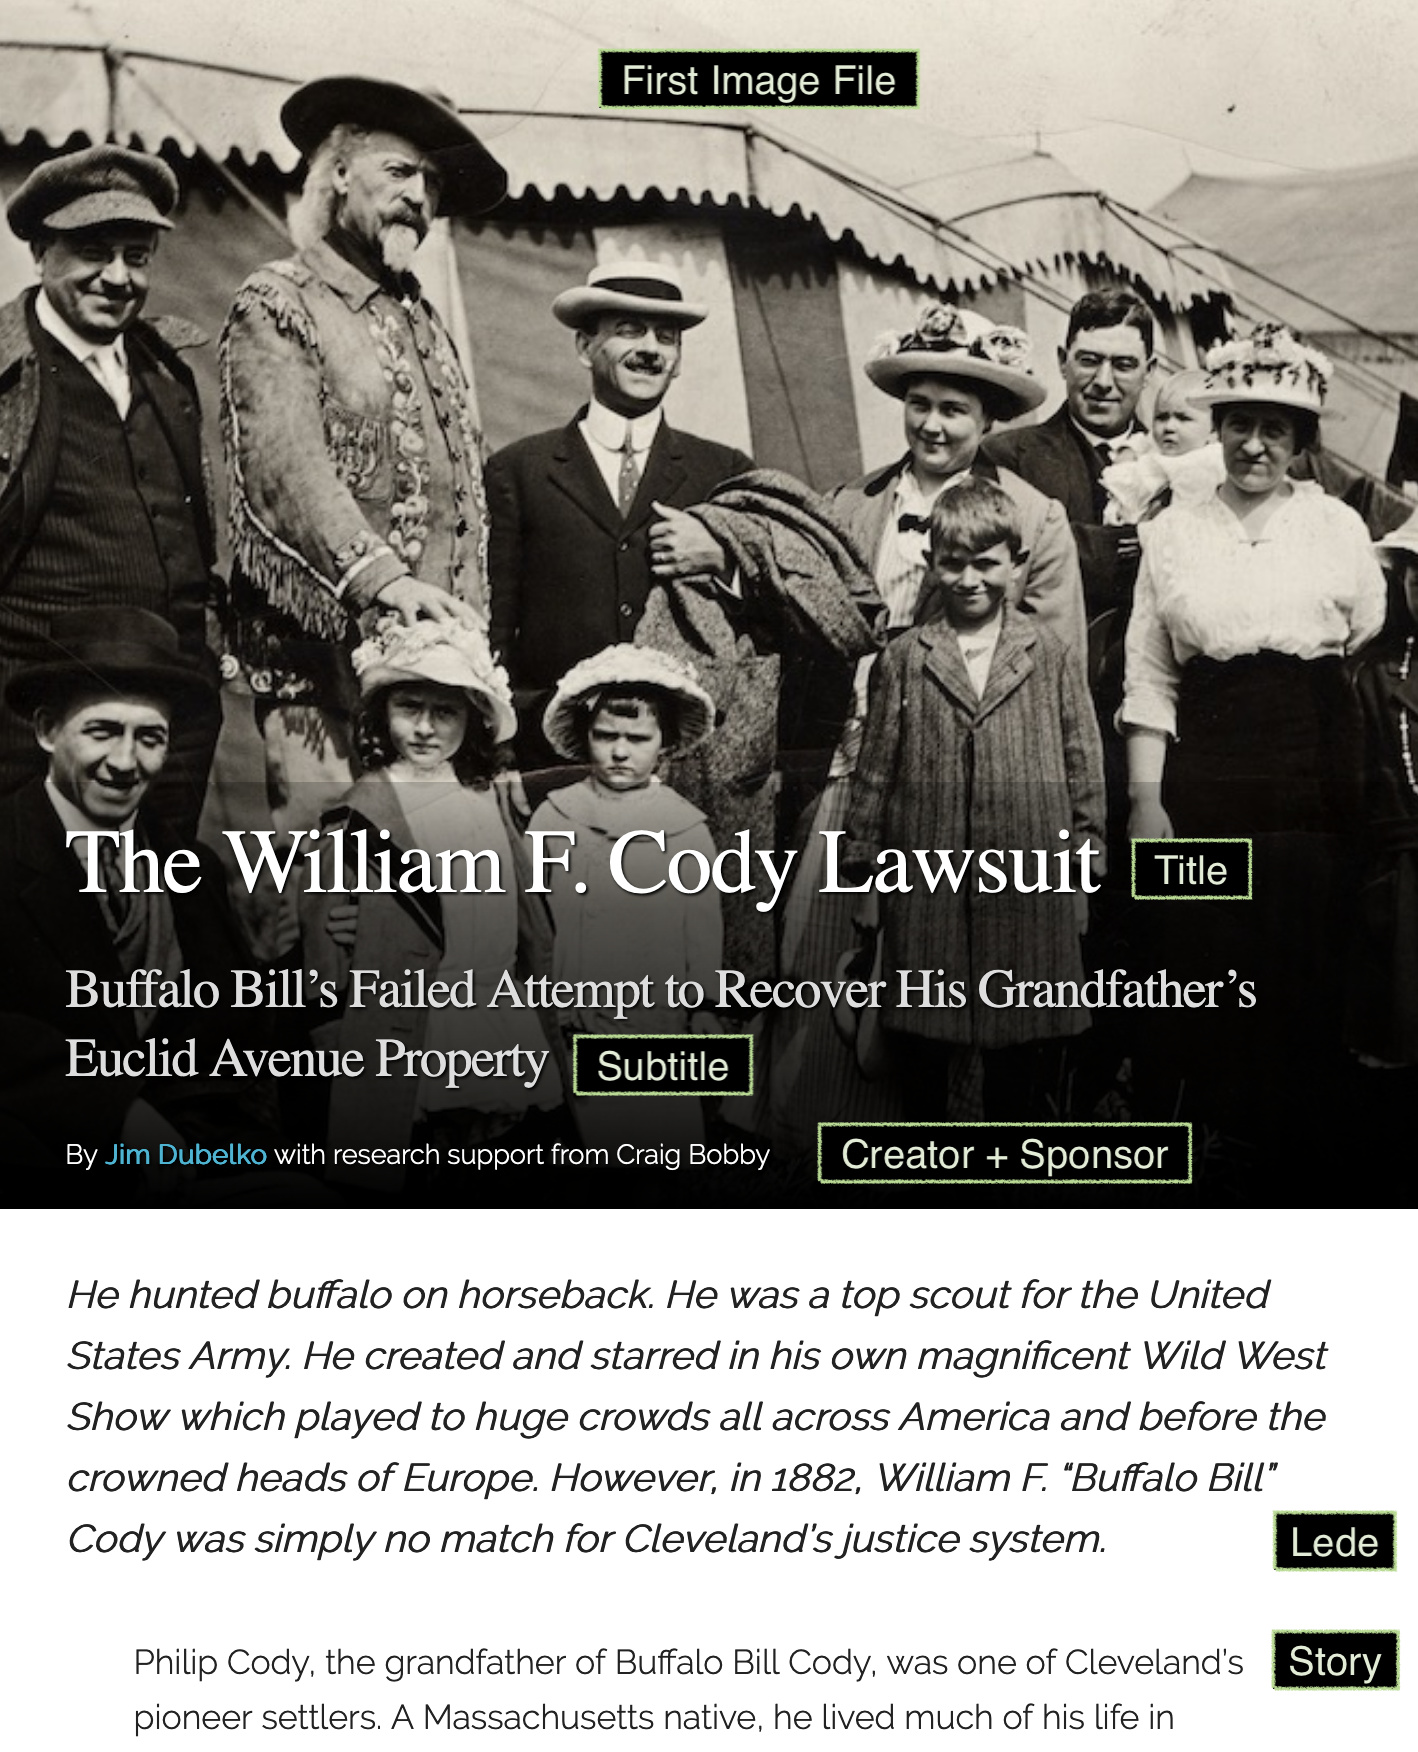
- The subtitle field is typically used to add detail and/or specificity to the title. It can also be used for other purposes that might be useful for your specific project (e.g. for a street address, an established date, etc.).
- The lede field is typically used to introduce readers to the arc of your story. It can also be used for abstracts. It is offset in a larger size and alternate style to add visual interest to your story, in addition to providing a useful introduction for readers who want to know a bit more before reading the full story.
- When using the creator field, be sure to add only one creator (author) at a time. To add additional creators, use the green “Add Input” button. This ensures that each author will have a unique link to all of their stories. Bylines with multiple authors will automatically be displayed with an ampersand and commas as needed. If you do not add any creators, your byline will read “By the [your project title] team.” If your project does not need bylines for individual stories, you can turn them off in theme settings.
Story
The story field contains your main narrative text. You can use HTML to add links and format text with styles such as italic, bold, and underline. To enable the visual HTML text editor, click the “Use HTML” checkbox below the text field. You should avoid changes to the text alignment and font. These are styled automatically. If you need to make significant changes to the way text or other elements are displayed, you can use the theme option for custom CSS.
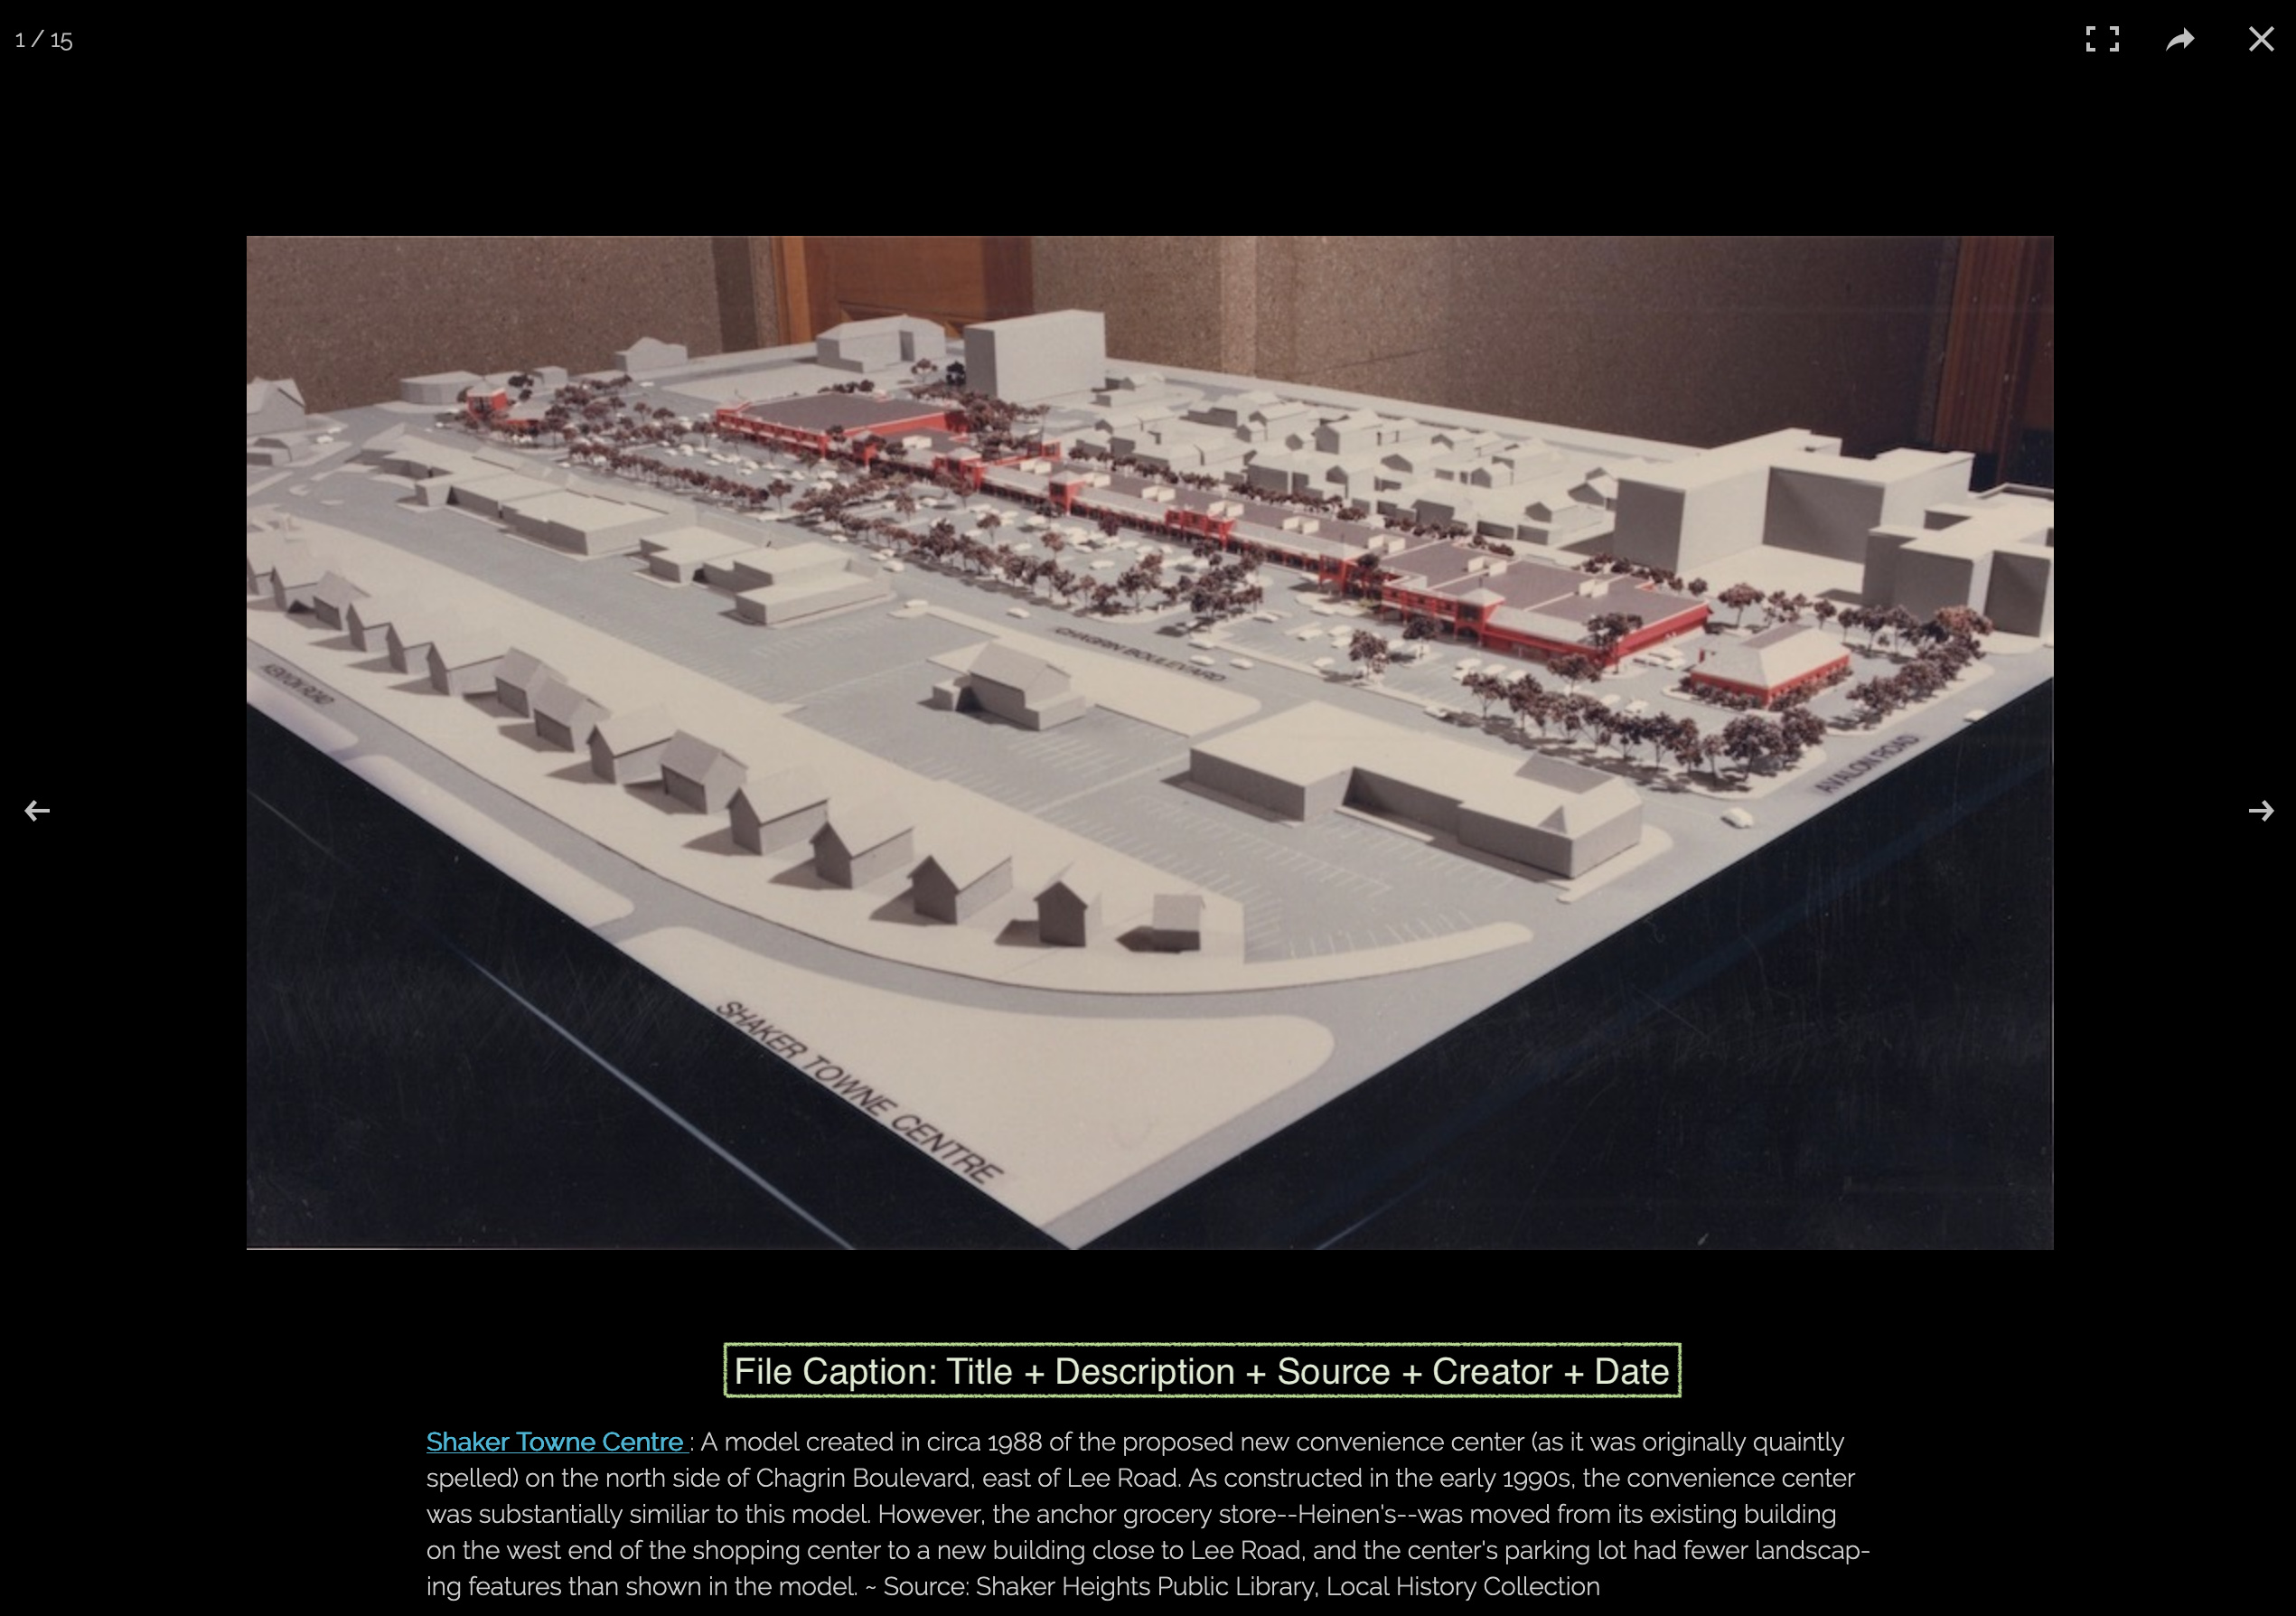
Media files and Captions
Each file can and should be accompanied by a caption. After adding files to an item and saving the form, you can return to the form to add metadata for each file. This metadata is combined to form the file caption. Below are some examples.
Image caption
Streaming Media (audio/video) caption
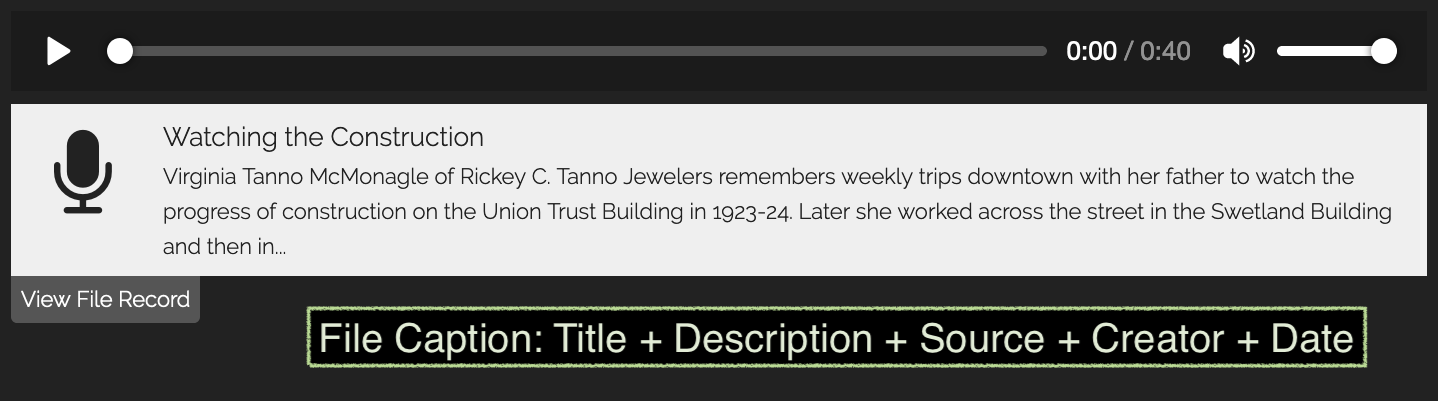
Note that users may click through to see any additional information you may have added to the file record.
Map
Each item/story has an interactive map representing its location. Clicking on the map marker reveals the hero image (first image file for the item) and truncated street address. The map caption appears below the map and combines the street address and access information fields.
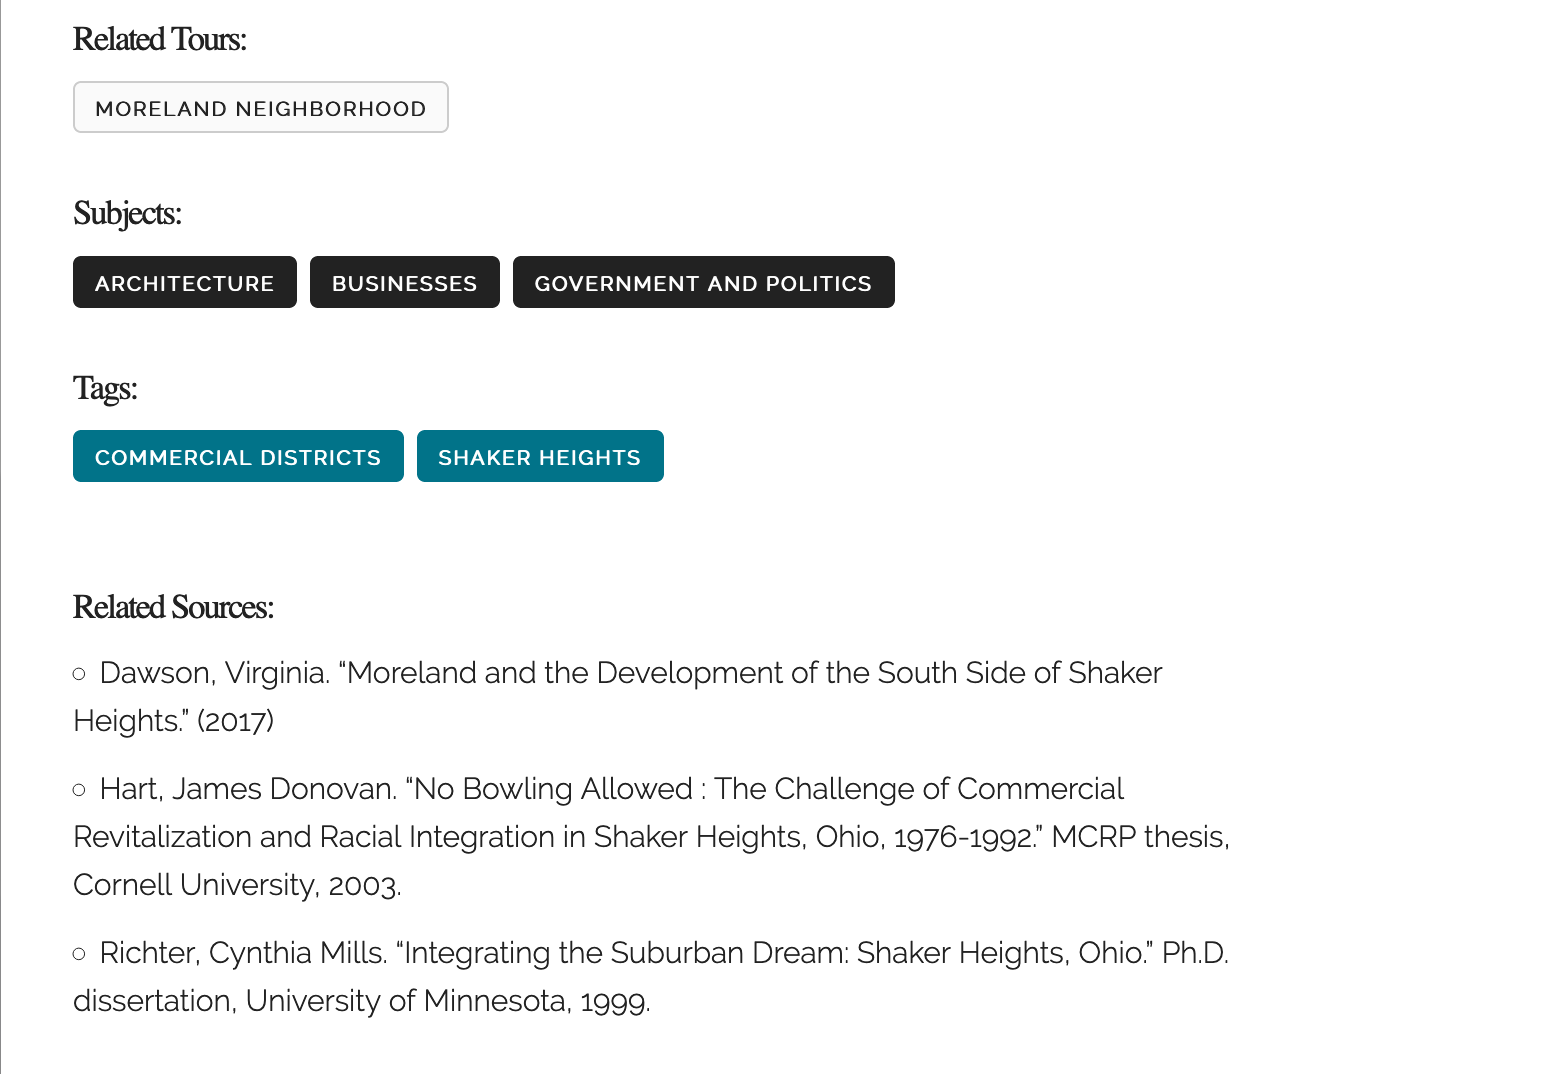
Other Metadata
At the end of your entry is a series of metadata fields that will keep users engaged with your content, either by clicking to view items with the same subjects or tags, by noting any tours in which this item appears, or by directing them to further reading in the form of related resources.